
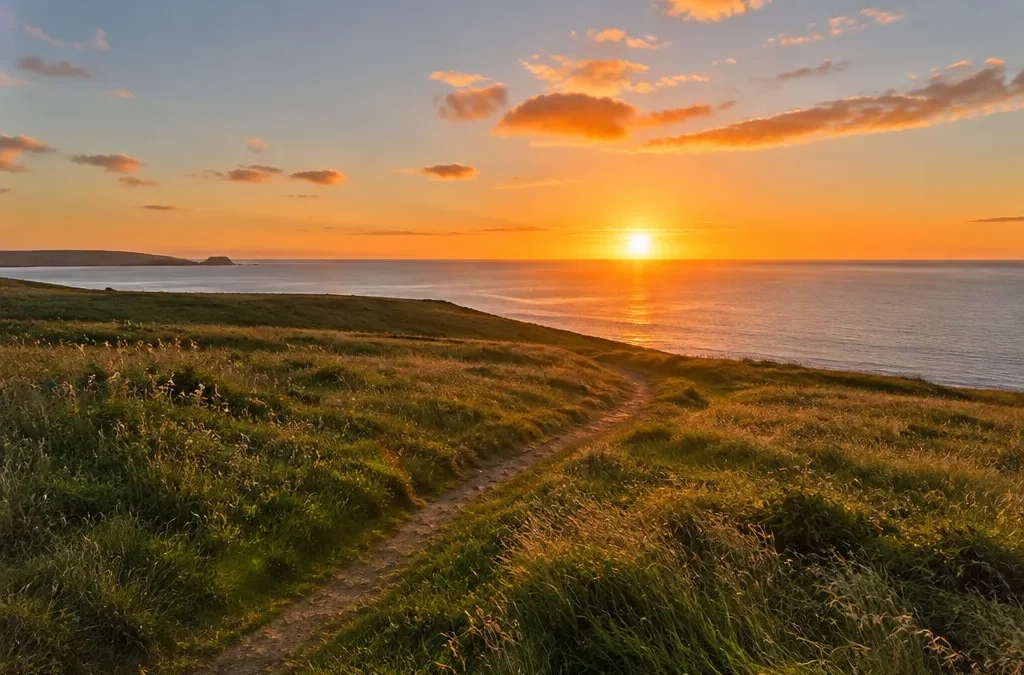
Golden hour is the short window just after sunrise and just before sunset when the sun sits low in the sky. The light turns warm, soft and directional, shadows grow long, and colors look richer than they do at midday. Golden hour photography means planning your shoot around this light.
Despite the name, golden hour is not always an hour. Depending on where you are and the time of year, it can last from about 20 minutes to well over an hour. Below you will learn what golden hour is, when it happens, how to find the exact time for your location, and which camera settings and techniques help you get the most out of it.
What is golden hour?
Golden hour is defined by the height of the sun, not by the clock. A common definition used by photographers and by sun-calculator sites is the period when the sun is between about 6 degrees above the horizon and about 4 degrees below it. Some sources use slightly different numbers, because there is no single official standard. What matters is the idea: the sun is low, close to the horizon.
When the sun is that low, its light travels through much more of the atmosphere before it reaches you. The atmosphere scatters shorter blue wavelengths, so more of the longer red, orange and yellow light gets through. That is why sunlight at this time looks warm and golden.
Why photographers love golden hour light
- Soft light: the low sun is less harsh than at midday, so contrast is gentler and faces look more flattering.
- Warm color: skin tones glow, landscapes look inviting, and skies can turn orange, pink and purple.
- Directional light: side light brings out texture in rocks, sand, bark and fabric.
- Long shadows: shadows add depth and shape to a scene.
- Easier backlight: with the sun low behind your subject, you can create rim light and glowing hair.
When is golden hour?
There are two golden hours each day, one in the morning and one in the evening:
- Morning golden hour starts a little before sunrise and ends when the sun has climbed roughly 6 degrees above the horizon.
- Evening golden hour starts when the sun drops to about 6 degrees above the horizon and ends a little after sunset.
In the mid-latitudes of the United States, using the definition above, evening golden hour usually starts roughly 30 to 45 minutes before sunset and ends around 15 to 20 minutes after it. The morning version mirrors that around sunrise. Many photographers simply plan to be in position about an hour before sunset, because the light is already warm and low by then. Treat these as ballpark figures and check a calculator for your exact location.
Is two hours before sunset good for photos?
Two hours before sunset, the sun is usually still fairly high, so the light is brighter and harsher than true golden hour. It can still work for scouting, test shots and group photos in open shade. For the warm, soft glow most people mean by golden hour lighting, wait until the last hour before sunset.
What time is golden hour today?
The exact time of golden hour changes every day and depends on your location. The easiest way to find it is to use a sun calculator or a photography planning app. Search for a “golden hour calculator,” enter your city or drop a pin on a map, and you will get the start and end times for the morning and evening golden hour. Many weather apps also show sunrise and sunset times, which gives you a good starting point.
How latitude and season change golden hour
How long golden hour lasts depends on the angle at which the sun crosses the horizon.
- Near the equator the sun rises and sets almost straight up and down, so it passes through the golden hour band quickly. Golden hour can last only about 20 to 30 minutes.
- In the mid-latitudes, where most of the United States sits, the sun rises and sets at a shallower angle. Golden hour usually lasts roughly 40 minutes to an hour, and it tends to be longer in winter than around the equinoxes.
- At high latitudes, such as Alaska or Scandinavia, the sun moves at a very shallow angle and golden hour can stretch well beyond an hour. Near the Arctic Circle in summer, the sun may stay low for much of the night, so golden light can last for hours.
Season matters too. In winter, the sun stays lower in the sky all day at higher latitudes, so the light can feel warm and low for much of the day. Weather also plays a role. Thin clouds can make a sunset spectacular, while a thick overcast can block the golden light entirely.
Golden hour vs. blue hour
Blue hour comes right before morning golden hour and right after evening golden hour, when the sun is below the horizon. The sky takes on a deep blue tone, and the light is soft and even. A common definition places blue hour when the sun is roughly 4 to 6 degrees below the horizon, which falls within civil twilight. Like golden hour, the exact range varies between sources.
Blue hour is great for cityscapes, where the blue sky balances well with warm street lights and lit windows. It is also a calm time for landscapes and water scenes. If you stay after sunset, you can often capture both golden hour and blue hour photos in one session. Bring a tripod, because blue hour light is dim and you will need longer shutter speeds.
How to plan a golden hour shoot
- Check the time. Look up golden hour for the exact spot you will shoot, not just your city.
- Check the direction. Planning apps show where the sun will rise and set on a map. Decide whether you want front light, side light or backlight on your subject.
- Scout the location. Visit in daylight if you can. Look for foreground interest, clean backgrounds and spots where hills or buildings might block the low sun.
- Arrive early. Be set up at least 30 minutes before the light you want. The best color often changes in minutes.
- Watch the weather. A few scattered clouds often catch the most color. A clear horizon helps if you want the sun itself in the frame.
- Stay late. Some of the best color appears after the sun has set, as the sky lights up and fades into blue hour.

Camera settings for golden hour photography
There is no single perfect setting, because the light keeps changing. These starting points work well. Adjust them as the sun drops.
Shoot in RAW
RAW files keep more detail in the highlights and shadows and let you fine-tune white balance later. Golden hour scenes often have a bright sky and a darker foreground, so the extra range helps.
White balance
Auto white balance often tries to neutralize the warm tones you came for, which can make the photo look cooler than the scene you saw. Try the Daylight, Cloudy or Shade preset, or set a Kelvin value around 5500 to 6500K and adjust to taste. If you shoot RAW, you can refine it in editing.
Exposure
- Aperture: for portraits, use a wide aperture such as f/1.8 to f/2.8 to blur the background. For landscapes, use f/8 to f/11 for more depth of field.
- ISO: start low, around ISO 100 to 400, and raise it as the light fades.
- Shutter speed: keep it fast enough to avoid blur if you shoot handheld. Switch to a tripod when the light gets too low.
- Exposure compensation: when shooting toward the sun, dial in a little negative exposure compensation to protect the bright sky from blowing out.
Check your histogram
The back screen can look brighter than your final image. Use the histogram to make sure the sky is not clipped. If the contrast is too high, bracket your exposures or use a graduated neutral density filter.
Golden hour photography tips for portraits
- Use backlight: place the sun behind your subject for glowing hair and a soft rim of light. Expose for the face.
- Add fill light: a simple reflector or a touch of fill flash lifts shadows on the face when the sun is behind the subject.
- Try side light: side light shapes the face and adds depth. Turn your subject slowly until you like the shadows.
- Embrace lens flare carefully: a little flare can feel dreamy. Too much washes out contrast. Move a few inches to control it.
- Focus on the eyes: backlight can confuse autofocus. Use single-point focus on the nearest eye.
- Protect your eyes: never look directly at the sun through an optical viewfinder, and do not point a camera or lens at the sun for long periods.
Golden hour photography tips for landscapes
- Use side light for texture: low light skimming across sand dunes, rocks or fields brings out every ridge and detail.
- Turn around: the best light is often behind you, lighting up mountains, trees or buildings with warm color.
- Add a foreground: flowers, rocks or reflections give depth. Place the horizon on a third line to decide between sky and foreground. Our rule of thirds guide explains how.
- Include the sun as a starburst: at small apertures like f/16, the sun can turn into a star. Partly hiding it behind an edge makes the effect stronger.
- Look for silhouettes: expose for the bright sky and let trees, people or boats go dark.
- Shoot water: lakes, rivers and the ocean reflect the golden sky and double the color in your frame.
Golden hour photos near and under water
If you shoot near the ocean, golden hour can make beach, coastline and surface scenes glow. Underwater, less light reaches the scene when the sun is low, so many underwater photographers prefer bright midday conditions and use strobes to restore color. Split shots, half above and half below the surface, can capture a warm golden sky above calm water. Always follow local safety rules, and never touch or disturb marine life for a picture. The EPIC rules explain the conservation standards entries must meet.
How to edit golden hour photos
Good golden hour editing enhances the light you captured instead of faking it. A light touch usually looks best.
- Fine-tune white balance: warm the image slightly if the camera cooled it, but keep skin tones and whites believable.
- Recover highlights: bring the sky down and lift the shadows gently so the scene looks like what you saw.
- Adjust color with care: small changes to the orange and yellow tones in Lightroom or a similar editor can make the glow richer without looking artificial.
- Keep it honest: adding a fake sun flare or a golden filter to a midday photo rarely convinces anyone, and many contests limit how far you can go.
Common golden hour mistakes
- Arriving late: by the time you park and set up, the best light may be gone.
- Staying in one spot: the light changes fast, so move around and try new angles during the session.
- Blowing out the sky: bright skies clip easily when you shoot toward the sun.
- Leaving auto white balance on: the camera may remove the warm glow you came for.
- Packing up at sunset: the afterglow and blue hour can produce the best photo of the evening.
Using golden hour photos in a contest
Warm, soft light can lift an image, but good light alone rarely wins. Judges still look at composition, technique and overall impact, as described in our judges’ guidelines. Make sure the light supports a clear subject and a story. Avoid pushing the saturation so far that skies turn neon. If you are preparing an entry, our guide on how to win a photography contest walks you through the rest of the process.
Golden hour checklist
- Look up golden hour and blue hour times for your exact location.
- Check where the sun will rise or set and plan your angle.
- Scout the spot and arrive at least 30 minutes early.
- Shoot RAW and set white balance to Daylight, Cloudy or a Kelvin value.
- Watch the histogram and protect the highlights.
- Try backlight, side light and front light in the same session.
- Bring a tripod for the last light and blue hour.
- Keep shooting after sunset while the sky keeps changing.